Learn How to Export Contacts from OLM to PST?

In this blog post, you will easily find a solution on how to export contacts from OLM to PST. So, read carefully and know the complete solution.
Mac Outlook is the email client used in the Macintosh machine for sending and receiving emails. It is offered by Microsoft and very much similar to MS Outlook for Windows. The only difference is the data file used to save emails and other user information. Whereas MS Outlook for Windows supports PST file format and Mac Outlook supports OLM file format. Therefore, if you need to access Mac emails on the Windows platform you need to transfer emails from Mac Outlook to Windows Outlook PST format.
How to Convert Mac OLM File to PST? – Reasons
To open Mac Outlook data in Windows Outlook, you must migrate OLM files to an Outlook for Windows. There are multiple reasons for converting Mac OLM to PST format. Hence the reasons for the conversion are:
- OLM file wants to share with colleagues using Windows.
- There is no direct approach to use Mac Outlook email in Windows Outlook.
- Organizations use Windows and Mac machines in different locations.
- MS Outlook interface is very easy for anyone to easily operate without any problems. But the Mac for Outlook interface wants some technical knowledge to work with.
How to Extract Emails from Mac for Outlook?
Here is a simple and easy step-by-step guide to export emails from Mac Outlook.
- Firstly, click on the Tools button and choose the Export button to Mac Outlook emails to the OLM file format.
- Note: When you don’t see the Export option? Then, make sure you have the latest version of MS Outlook.
- In the Export to Archive (.olm) dialog box, find the Favourites on the left side, choose the Downloads folder then click on the save option.
- Now, data items export and you will get a notification message. Press the Finish button to complete the last step.
Free Solution to Perform Mac Outlook Emails to Windows Outlook Process
The manual solution is divided into 4 methods. All the steps are explained in an expressive way. Follow these steps mentioned below-
Method#1. Create IMAP Email Account
- Login to your Gmail Account and then go to Gear icon button and right-click on it.
- Then, press the Settings option
- Now, on the Setting section, you just need to click on Forwarding and POP or IMAP option
- After this, verify the IMAP Access status (If IMAP status is disabled then enable it)
- Now your IMAP email account is successfully created.
Method#2. Add Mac Outlook through IMAP Email Account
- Now, open Mac Outlook and go the Tool option and select Accounts
- Then, choose Email and type your email ID, password and other information
- In the next step, add IMAP server and choose SSL connection using SMTP server and 465 as a port number after that press the Add Account.
Method#3. Export Outlook for Mac Emails to IMAP Account
- Firstly, open the Outlook for Mac program and select the data items you want to transfer
- Then, right-click on the selected folder or press the Move and Copy to Folder
- Now, give the name of your IMAP folder and choose copy
- Finally, Update the IMAP folder through Send/Receive option and all your OLM files are exported to the IMAP account.
Method#4. Transfer IMAP Email Account with Windows Outlook
- Go to the Control Panel >> Mail >> Email Accounts >> New
- Then, select manually configure server settings and then click on Next to continue
- After this, choose IMAP/POP setting and press the OK option
- Now, enter your IMAP account credentials and Incoming and Outgoing server information. After this, choose more settings.
- Select the Advanced section and type 993 port number in IMAP server then choose SSL connection.
- Now, give the port number of SMTP server as 465 and select SSL connection. Click on Ok button.
- Finally, press the Next option and a few moments complete the process successfully.
Drawbacks of Free Manual Solutions
- The manual process is a complicated and risky method
- Time-consuming and confusing process.
- Requires deep technical knowledge to perform this process.
- Chances of data loss and corruption.
This manual process has some limitations so it is better to switch to an alternative.
Expert Solution – Export Contacts from OLM to PST with OLM to PST Converter

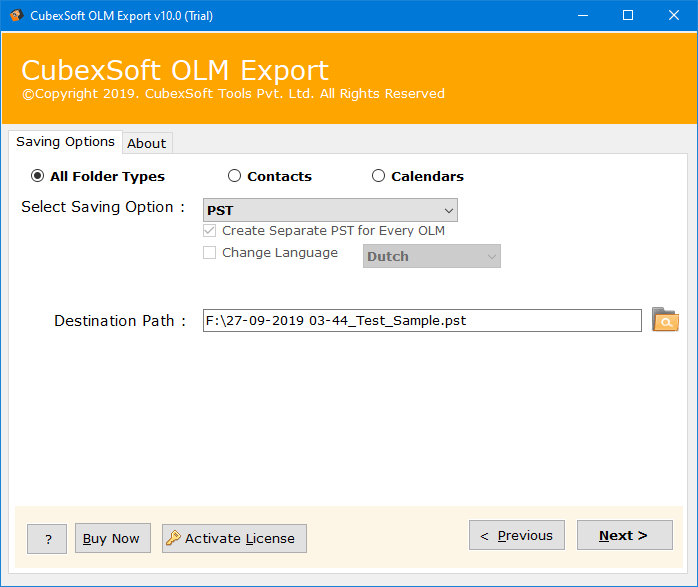
The above-mentioned manual process is hectic and needs deep technical knowledge to follow all the steps properly. So, it is better to choose the expert-recommended OLM to PST Converter tool to export contacts from OLM to PST with all emails, calendars, tasks, notes, etc. along with attachments. With the help of this software, you can easily execute the migration procedure without taking professional help. Moreover, it is designed with a comprehensible and easy-to-use interface so a novice user can also use it. Also, OLM Converter Tool is compatible with all Windows & macOS versions including latest.
The Final Lines
This blog post explains how to export contacts from OLM to PST. Although, we have explained a step-by-step process to export OLM to Outlook for Windows. So, you can choose anyone as per their needs and requirements. But experts suggested choosing a third-party tool to avoid data loss issues.
Read Also: EML to PST Converter to Batch Import EML Files into Outlook


